Currently, I am taking
Statistics for Image Analysis on my masteral, and have been exploring this topic in R. One package that has the capability in this field is the
EBImage from
Bioconductor, which will be showcased in this post.
Installation
For those using Ubuntu, you may likely to encounter this error:
It has something to do with the
tiff.h C header file, but it's not that serious since
mytechscribblings has an effective
solution for this, do check that out.
Importing Data
To import a raw image, consider the following codes:
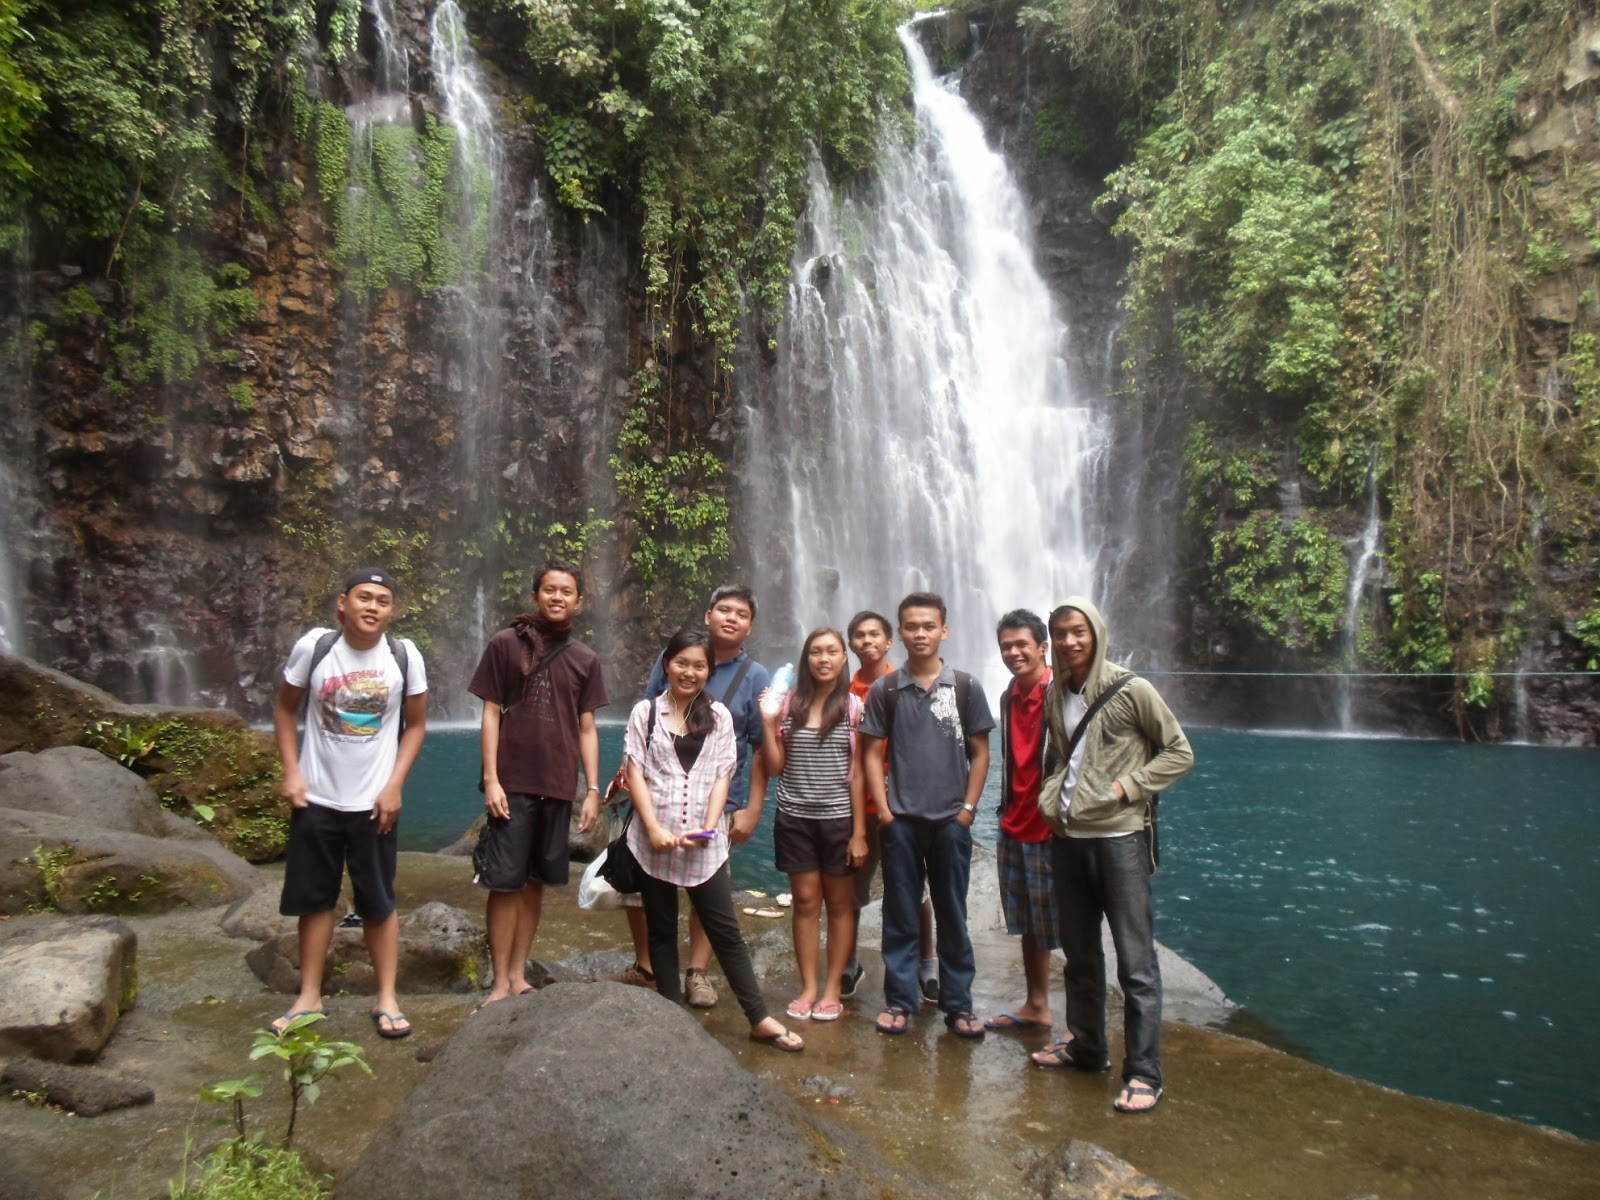 |
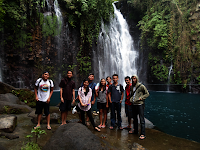
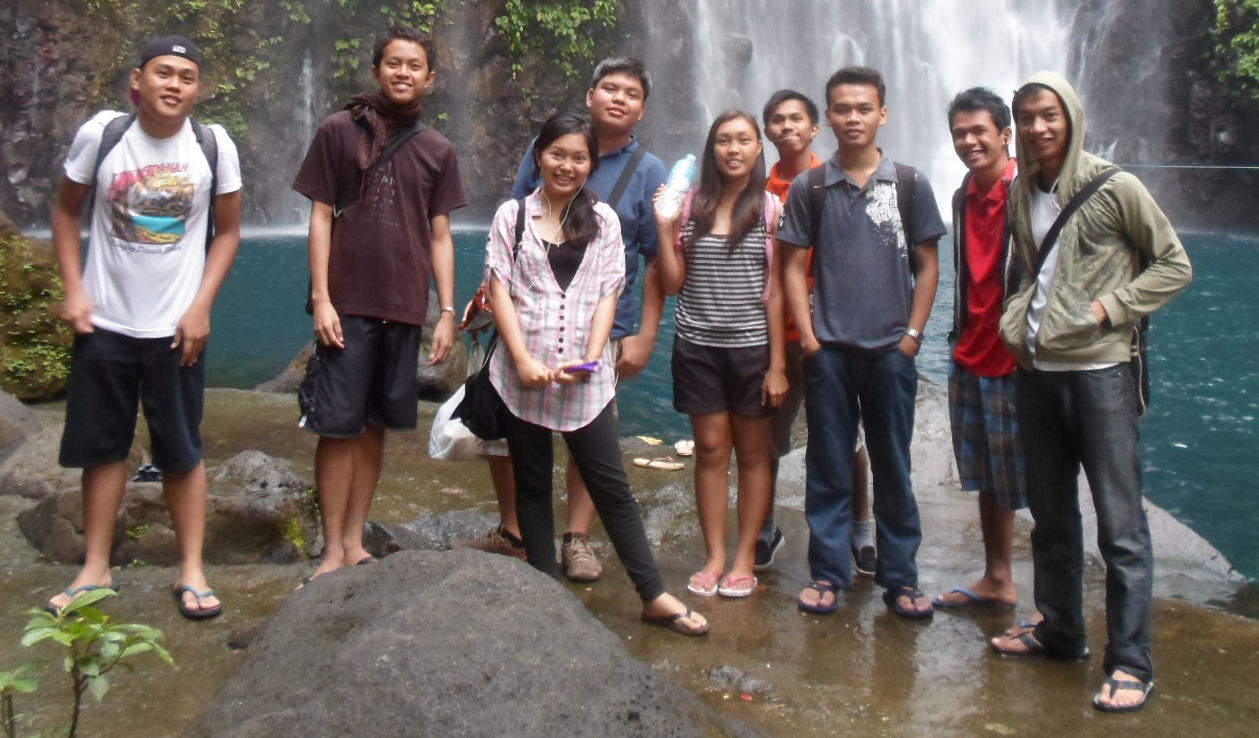
Output of display(Image). |
Yes, this is the photo that we are going to use for our analysis. Needless to say, that's me and my friends. In the proceeding section we will do image manipulation and other processing.
Image Properties
So what do we get from our raw image? To answer that, simply run
print(Image). This will return the properties of the image, including the array of pixel values. With these information, we apply mathematical and statistical operations to do enhancement on the image.
There are two sections (Summary and array of the pixels) in the above output, with the following entries for the first section:
| Code | Value | Description |
Table 1: Information from 1st section of print(Image).
|
colormode | Color | The type (Color/Grayscale) of the color of the image. |
storage.mode | double | Type of values in the array. |
dim | 1984 1488 3 | Dimension of the array, (x, y, z). |
nb.total.frames: | 3 | Number of channels in each pixel, z entry in dim. |
nb.render.frames | 1 | Number of channels rendered. |
The second section is the obtained values from mapping pixels in the image to the real line between 0 and 1 (inclusive). Both extremes of this interval [0, 1], are black and white colors, respectively. Hence, pixels with values closer to any of these end points are expected to be darker or lighter, respectively. And because pixels are contained in a large array, then we can do all matrix manipulations available in R for processing.
Adjusting Brightness
It is better to start with the basic first, one of which is the brightness. As discussed above, brightness can be manipulated using
+ or
-:
| Lighter | Darker |
Table 2: Adjusting Brightness.
|
 |
Output of display(Image1). |
|
 |
Output of display(Image2). |
|
Adjusting Contrast
Contrast can be manipulated using multiplication operator(
*):
| Low | High |
Table 3: Adjusting Contrast.
|
 |
Output of display(Image3). |
|
 |
Output of display(Image4). |
|
Gamma Correction
Gamma correction is the name of a nonlinear operation used to code and decode luminance or tristimulus values in video or still image systems, defined by the following power-law expression:
\begin{equation}\nonumber
V_{\mathrm{out}} = AV_{\mathrm{in}}^{\gamma}
\end{equation}
where $A$ is a constant and the input and output values are non-negative real values; in the common case of $A = 1$, inputs and outputs are typically in the range 0-1. A gamma value $\gamma< 1$ is sometimes called an
encoding gamma (Wikipedia, Ref. 1).
| $\gamma = 2$ | $\gamma = 0.7$ |
Table 4: Adjusting Gamma Correction.
|
 |
Output of display(Image5). |
|
 |
Output of display(Image6). |
|
Cropping
Slicing array of pixels, simply mean cropping the image.
 |
| Output of the above code. |
Spatial Transformation
Spatial manipulation like rotate (
rotate), flip (
flip), and translate (
translate) are also available in the package. Check this out,
Color Management
Since the array of pixels has three axes in its dimension, for example in our case is 1984 x 1488 x 3. The third axis is the slot for the three channels: Red, Green and Blue, or RGB. Hence, transforming the
color.mode from
Color to
Grayscale, implies disjoining the three channels from single rendered frame (three channels for each pixel) to three separate array of pixels for red, green, and blue frames.
| Original | Red Channel |
Table 5: Color Mode Transformation.
|
|
|
|
| Green Channel | Blue Channel |
|
|
|
To revert the color mode, simply run
Filtering
In this section, we will do smoothing/blurring using low-pass filter, and edge-detection using high-pass filter. In addition, we will also investigate median filter to remove noise.
| Low-Pass (Blur) |
Table 6: Image Filtering.
|
|
|
| High Pass |
|
|


Comments
Post a Comment